Installing a Shift Kit:
About six months ago I bought a base model Toyota Yaris. I like the car very much and have been getting a reliable 40 miles per gallon from it. Another great thing is that it's a sporty little car, much more fun to drive then a Prius. However the shifter sucks, it's rubbery and the throw is so long I have to lean forward in my seat to get it into 5th gear.
Searching the web, I found a short shift kit from a Canadian company called TWM Performance. However, it was for the Canadian spec 2006 Yaris, nothing was listed for a 2007 U.S. spec model. I went ahead and ordered the 2006 Canadian Yaris short shift kit and was able to install it with almost no trouble in my U.S. spec car.
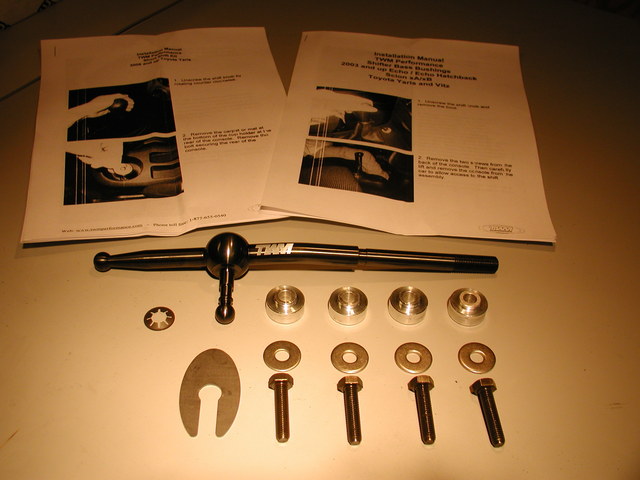
The kit came with very good installation instructions so I will only cover the differences of the U.S. spec vehicle here. You can order the short shifter with or without an aluminum bushing kit for the shift tower. You definitely want to get the bushing kit! it makes a big difference in the way the shifter feels.
Heres what you get in the kit:
- a shorter shift lever.
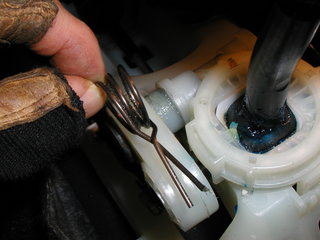
- a new spring clip, you'll have to break the old one to get it off.
- a tool for removing the plastic cup from the bottom of the old shifter.
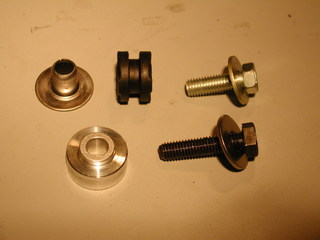
- 4 shift tower bushings and slightly longer screws to mount the tower with the new bushings.
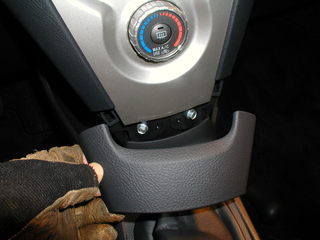
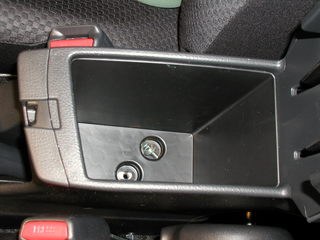
The center console and dashboard are different in the U.S. spec Yaris. Take the shifter knob off then start by pulling out the bottom most piece of the HVAC console. Next pull the top of the shift console straight up. I didn't need any tools to pop these pieces off.
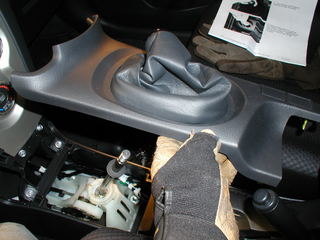
The sides of the center console are held in with 4 screws, two in the front and two in the rear storage compartment under the scrap of cloth at the bottom.
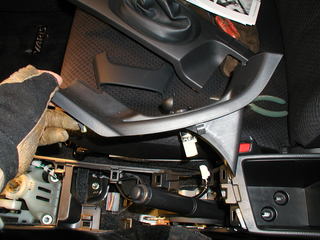
Disconnect the cigar lighter socket and remove the center console. Follow the instruction from TWM to change out the shifter. After the new shifter is in you can replace the 4 rubber bushing that support the shift tower with the solid aluminum ones.
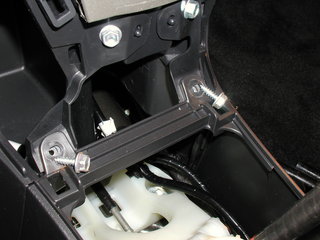
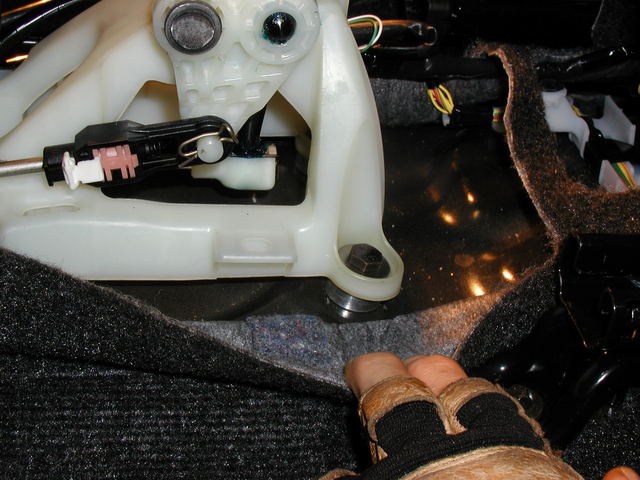
Here's what they look like in place:
The instructions tell you to put this spring back in the same way it came out, but I decided that it made the shifter's side-to-side movement too stiff, so I left it out entirely.
The stock bushing that attached the top of the shifter boot to the shifter was way too big to fit the new shift lever. However, one of the no-longer needed rubber bushing from the shift tower base fit in the top of the boot perfectly!

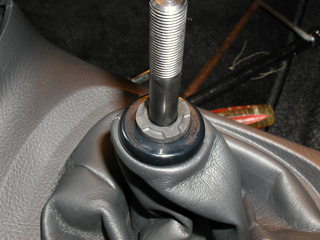
Here's the bushing in place, put it in the top of the boot first and then slide the boot down over the shifter.
