| The partition at the front of the bedroom will contain a desk, closest, bookshelf,
and several cupboards. |
 |
|
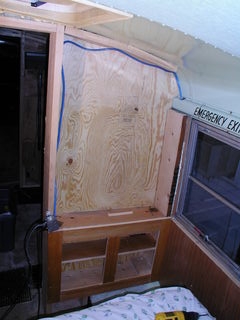
| I started from the bottom up, I didn't really have a plan other than knowing I
wanted cupboards on the bottom, the desk, a bookshelf, and whatever might fit above
that. I did have a set of doors that determined the size for each opening. |
 |
|
The back of the desk.
|
 |
|
The desk. Since I'm working with re-used material I don't have the luxury of having
a lot of long pieces of wood so I split up the face frames such that they could be
built from short bits.
|
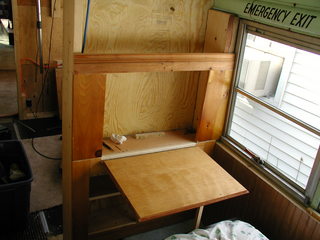 |
One of the great things about working with re-used and recycled
materials is that the limitations placed on you by the materials often leads to details
like the horizontal molding seen here. |
| I salvaged the piano hinge for the desk from one of the "School Bus" sign doors
that covered the upper "windows" on the front and back of the bus. |
 |
|
| Here's the finished desk side, there are still two doors to install on the cupboard
below. |
 |
|
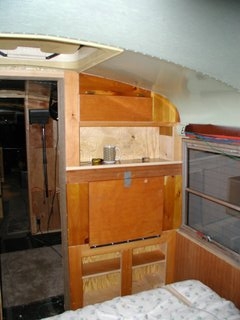
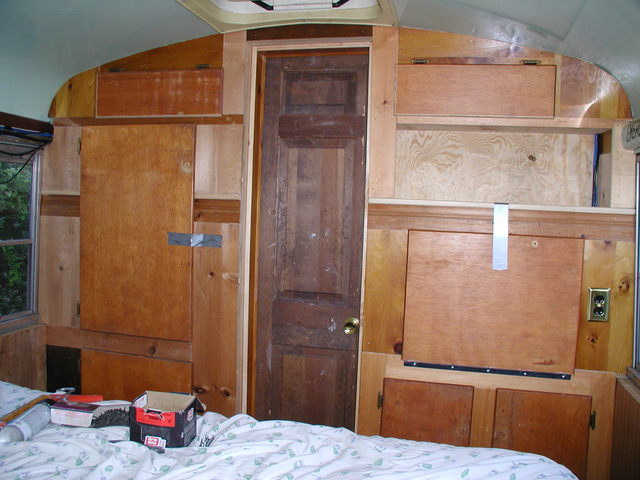
| Here is the beginning of the closest. All of the woodwork in the bus will
ultimately be painted with the exception of the vertical bead-board paneling on the
sides. While I like the look of varnished wood, paint will work to unify the different
colors and finishes of of the recycled pieces. |
 |
|
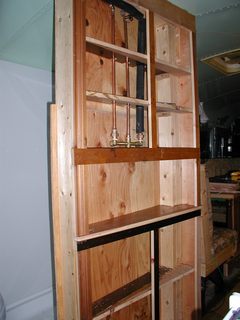
| The bedroom cabinetry mostly complete. I'm not sure what will go under the closet
yet, perhaps a drawer. |
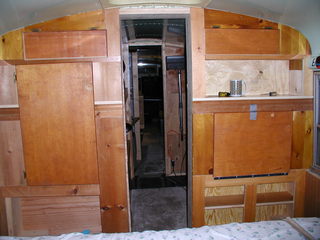 |
You can see I carried the molding feature across to the closet
side, I think it will look nice painted a complimentary color. |
Here's the completed wall.
|
Bunk room:
|
|
|
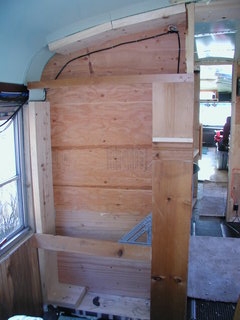
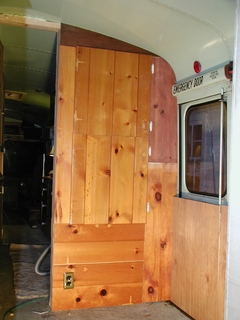
This is the broom closet in the partition at the forward end of the bunk room. It's
only 3 1/2" deep but there are a lot of tall skinny things (like brooms and the wand
for the vacuum) that will go in here.
There will be two mini-van seats in front of this wall so the door is split, the bottom
half will only open when the backs of the seats are folded flat. |
 |
|
I sliced up and re-glued another 30" six paneled door to make an 18 1/2" wide
3-paneled door.
The cheap doweling jig I bought did a terrible job of lining up the slices so I had to
plane the door some. |
 |
|
Front:
|
|
|
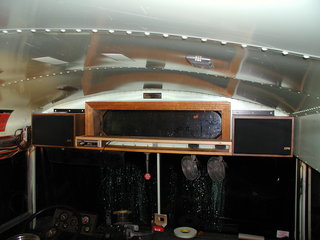
| I built a shelf for the radio and trimmed out the front window. I had originally
planned to use a household type stereo powered off of the inverter. However, I found
that the household stereo did not do well while the vehicle was in motion and after a
while developed some problems that I suspect were due to the modified-sine wave output
of the inverter. |
 |
|
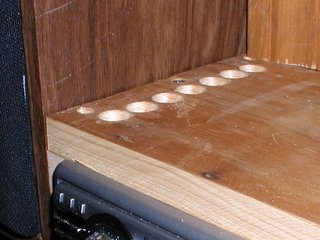
| The radio had a heat sink along one side and I wanted to be sure there was
sufficient cooling so I drilled a bunch of holes in the top and bottom shelves. |
 |
|
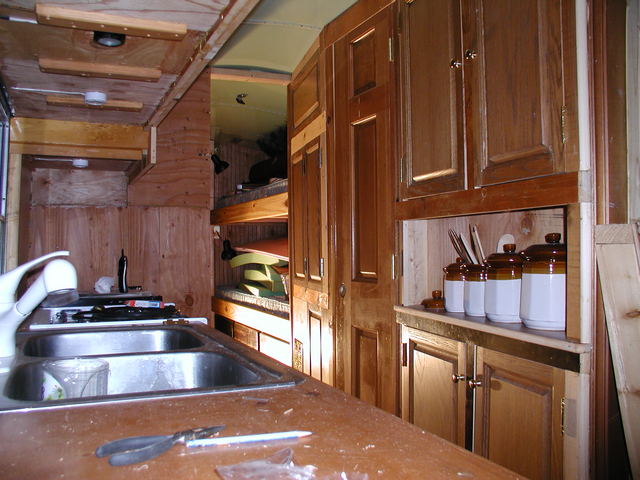
Pantry:
|
|
|
The space next to the shower seemed an obvious place for the pantry. Since the
dinette seat jutted out into the aisle a little I decided to make the pantry a
trapezoidal shape to smooth the transition and so it could hold just a little more
stuff.
Step one was to make the shelves. |
 |
I'm running a little low on wide boards right now so I built the shelves out
of narrow scraps. This also made the construction a little easier as I was making one
rectangle and one triangle per shelf.
I hope that Saturday's trip to the dump will bring some new material. |
| Next I built the face frames for the doors. |
 |
|
| Here's the completed cabinet with the doors in place. |
 |
|
| Another view |
 |
|