Final Assembly:
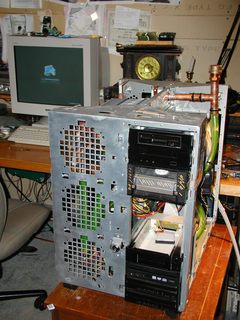
| I painted all of the drives black. I am a terribly lazy man so I just held
them up and sprayed them, I didn't try to mask anything I just scraped the black paint
off of the LEDs afterwards. |
 |
|
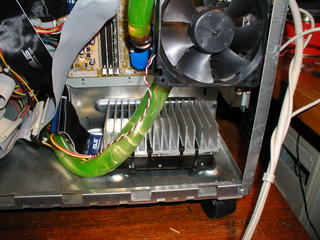
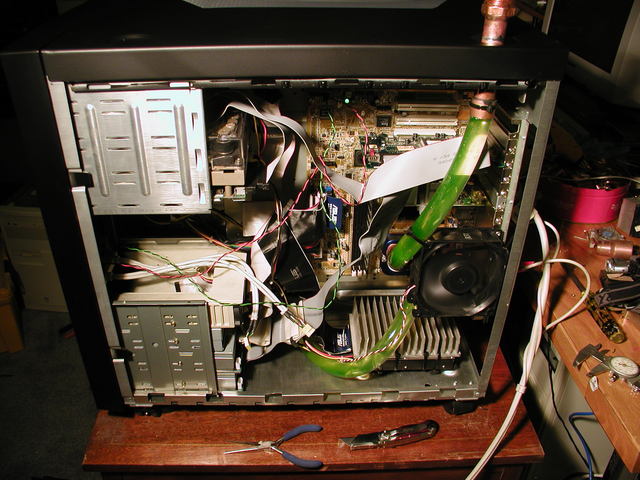
| I cut a nice chunk of heat sink out of a 3 foot section I had and Ty-wrapped it to
my 120 GB hard drive. The HD is mounted on 4 pieces of closed cell foam cut from
a piece of pipe insulation. |
 |
|
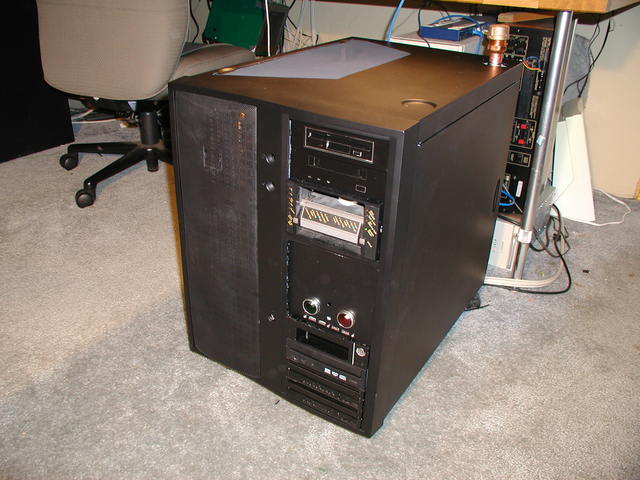
| The front panel will contain USB connectors, power and reset buttons and the pilot
LED and disk activity LED. |
 |
|
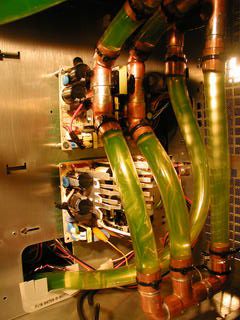
| I installed a second PSU beneath the first to power the SCSI CD changers, the half
a fan and the case light. I spread the fingers on the heat sinks out to maximize the convective air cooling, with a small load it barely gets warm. |
 |
|
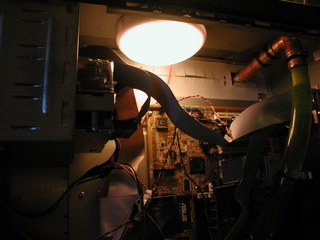
| It's not a blue cold cathode but it will be welcome the next time I crawl under the
desk to install some hardware. It's powered off of the secondary PSU so it stays
on when the PC is shut down. |
 |
|
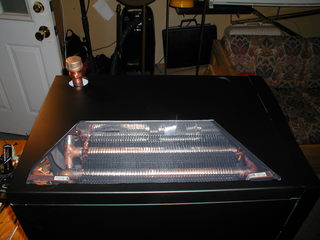
| I cut out part of the top to let the warm air rise unimpeded and covered the
opening with aluminum window screen. |
 |
|
| All done and ready to close. |
 |
|
 |
||
 Conclusion:The system works well. The thermosiphon effect is sufficient to cool the PC and the choice of baseboard radiator seems to have been correct and promotes convective cooling on the air side. Experimentally placing a fan in the case to push more air over the radiator did not significantly lower die temp at the CPU. However, I think I will try a separate cooling loop for the PSU and an automotive heater core instead of the baseboard.Tomorrow I should receive my Athlon XP 3200+ and we will see if the thermosiphon effect can keep up. Update:I've received and installed the XP 3200+ CPU. Whether due to the larger size of the Barton core, a more efficient CPU, or the Arctic Silver I used instead of the Arctic Alumina, I am finding that the XP 3200+ runs slightly cooler then the 2400.Jake. |
||
| <-- Previous | Start --> |
